DevOps Post 1: Setting up Rancher on k3s

Welcome to the first post in the series. First of all, we need to set up the Rancher control plane node on something within our test environment. For us, we standardized this whole setup on Rocky Linux. For this test Rancher installation, we installed it on k3s on the Rocky Linux node.
For production environments, I recommend that you set your Rancher cluster on a highly available Kubernetes cluster, for example, a Nutanix Kubernetes Platform cluster. But for this example and our dev environment, we're setting this up on a single-node k3s cluster.
First of all, you need to install a Rocky Linux VM in your environment. Unfortunately, this blog series will not cover how to set up a new VM on the Nutanix platform, but I have earlier posts available to explain that.
In the post linked below, I cover how to set up a Rocky Linux VM on Nutanix. For details, check that out:
Installing k3s on Rocky Linux
Once you have your Rocky Linux node set up in the environment, you'll need to install k3s so that the VM is ready to deploy Rancher.
First, make sure that the VM is fully upgraded by running these commands:
sudo dnf update -yAfter your installation is successfully updated, reboot the VM.
Now, time to install k3s. Do that by running the following command:
curl -sfL https://get.k3s.io | sh -Next, install Helm. We will need that to deploy Rancher on k3s later on:
curl -fsSL -o get_helm.sh https://raw.githubusercontent.com/helm/helm/main/scripts/get-helm-3
bash get_helm.sh
Then, copy the k3s kubeconfig to the local user's ~/.kube/ directory with the following commands:
mkdir ~/.kube/
cp /etc/rancher/k3s/k3s.yaml ~/.kube/config.yaml
Now you should be able to confirm that you have k3s installed by running the following command:
kubectl get pods -AYou should see output similar to this:
[root@rancher-demo ~]# kubectl get pods -A
NAMESPACE     NAME                                      READY   STATUS      RESTARTS   AGE
kube-system   coredns-697968c856-5sb5b                  1/1     Running     0          106s
kube-system   helm-install-traefik-crd-b562d            0/1     Completed   0          107s
kube-system   helm-install-traefik-sgnpl                0/1     Completed   2          107s
kube-system   local-path-provisioner-774c6665dc-s2ngr   1/1     Running     0          106s
kube-system   metrics-server-6f4c6675d5-9j6cg           0/1     Running     0          106s
kube-system   svclb-traefik-4481d4e5-pxx64              2/2     Running     0          80s
kube-system   traefik-c98fdf6fb-frr5r                   1/1     Running     0          80s
Now that we have Helm and k3s installed, we can go ahead and install Rancher on this k3s cluster. But before we do that, we need to discuss DNS names and certificates since the Rancher installation is quite sensitive to correct certificates being used.
Certificates and DNS
Our test Nutanix Prism Central is installed with a certificate that is signed by our internal Active Directory CA. This is perfectly fine, but for the Rancher installation to trust our internal CA, which is not publicly trusted, we need to install Rancher with this option: "--set additionalTrustedCAs=true"
The certificate that we will use for the Rancher installation itself is a wildcard cert. So, we will install this with the options: "--set ingress.tls.source=secret" and "--set hostname=test.k8s.example.com"
During my setup, I encountered some issues related to certificates. When we create the ingress secret later for the Rancher installation, it is important that the chain in the public certificate contains both the public certificate and the intermediate certificate.
Installing Rancher with Helm
Let’s go ahead and install Rancher using Helm:
First, add the Rancher repo:
helm repo add rancher-latest https://releases.rancher.com/server-charts/latestkubectl create namespace cattle-system
KUBECONFIG=/etc/rancher/k3s/k3s.yaml helm install rancher rancher-latest/rancher --namespace cattle-system --set hostname=gdm-demo.k8s.domain.com --set bootstrapPassword=admin --set ingress.tls.source=secret --set additionalTrustedCAs=trueYou should see output like this:
NAME: rancher
LAST DEPLOYED: Wed Jun 11 14:49:02 2025
NAMESPACE: cattle-system
STATUS: deployed
REVISION: 2
TEST SUITE: None
NOTES:
Rancher Server has been installed.

NOTE: Rancher may take several minutes to fully initialize. Please standby while Certificates are being issued, Containers are started and the Ingress rule comes up.

Check out our docs at https://rancher.com/docs/

If you provided your own bootstrap password during installation, browse to https://gdm-demo.k8s.domain.com to get started.

If this is the first time you installed Rancher, get started by running this command and clicking the URL it generates:

```
echo https://gdm-demo.k8s.domain.com/dashboard/?setup=$(kubectl get secret --namespace cattle-system bootstrap-secret -o go-template='{{.data.bootstrapPassword|base64decode}}')
```

To get just the bootstrap password on its own, run:

```
kubectl get secret --namespace cattle-system bootstrap-secret -o go-template='{{.data.bootstrapPassword|base64decode}}{{ "\n" }}'
```
Now, deploy the ingress secret. Start by creating the files containing your public cert (in our case it’s a wildcard for *.k8s.domain.com), both the chain and the key. Then, run this command:
kubectl -n cattle-system create secret tls tls-rancher-ingress --cert=tls.crt --key=tls.keyChange the filenames to match your files 😄
Next, create the ca-additional secret. Create a file with your additional CA trust bundle. In my case, I had our Active Directory CA cert among some other CAs that i would like to trust. Then, create the secret:
kubectl -n cattle-system create secret generic tls-ca-additional --from-file=ca-additional.pem=./ca-additional.pemDuring the Rancher deployment, you might see this error in the logs:
kubectl -n cattle-system logs rancher-5cbcdfdb75-nd7sx -f

2025/06/11 13:15:29 [ERROR] Failed to connect to peer wss://10.42.0.10/v3/connect [local ID=10.42.0.9]: dial tcp 10.42.0.10:443: connect: no route to host
2025/06/11 13:15:30 [ERROR] Failed to connect to peer wss://10.42.0.11/v3/connect [local ID=10.42.0.9]: dial tcp 10.42.0.11:443: connect: no route to host
2025/06/11 13:15:34 [ERROR] Failed to connect to peer wss://10.42.0.10/v3/connect [local ID=10.42.0.9]: dial tcp 10.42.0.10:443: connect: no route to host
2025/06/11 13:15:35 [ERROR] Failed to connect to peer wss://10.42.0.11/v3/connect [local ID=10.42.0.9]: dial tcp 10.42.0.11:443: connect: no route to host
2025/06/11 13:15:39 [ERROR] Failed to connect to peer wss://10.42.0.10/v3/connect [local ID=10.42.0.9]: dial tcp 10.42.0.10:443: connect: no route to host
2025/06/11 13:15:40 [ERROR] Failed to connect to peer wss://10.42.0.11/v3/connect [local ID=10.42.0.9]: dial tcp 10.42.0.11:443: connect: no route to host
This occurs because of Rocky Linux firewalling. Fix it with these commands:
firewall-cmd --permanent --zone=trusted --add-source=10.42.0.0/16 #pods
firewall-cmd --permanent --zone=trusted --add-source=10.43.0.0/16 #services
firewall-cmd --reload
After this, the logs should show:
2025/06/11 13:17:43 [INFO] Handling backend connection request [10.42.0.10]Now, browse to your URL, in my case https://gdm-demo.k8s.domain.com.
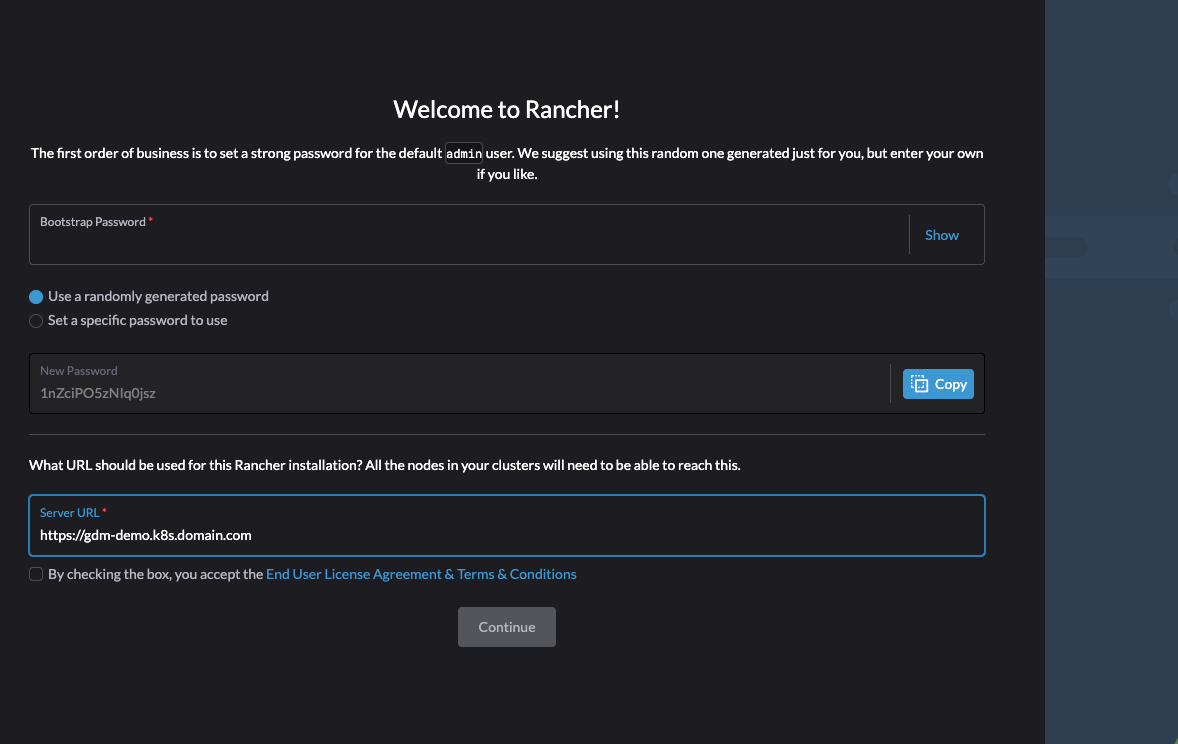
Welcome to rancher. Now enter the bootstrap password that you get form the cluster by running this command:
kubectl get secret --namespace cattle-system bootstrap-secret -o go-template='{{.data.bootstrapPassword|base64decode}}{{ "\n" }}'Enter the result in the bootstrap area, set your new admin password, accept the EULA, and log in!

Now we have successfully deployed Rancher on Rocky Linux 9.6. Stay tuned for the next episode in the blog series!
Post 2: Deploying your first RKE2 downstream cluster using the Nutanix Node Driver