NKP Post 3: Deploying the NKP mgmt Cluster

So let's go ahead and deploy the NKP management (Kommander) cluster. Now the fun part begins. We've already done most of the hard work preparing and ensuring all the prerequisites are in place!
Connect to your Bastion host that we installed in part one of this series. Start by creating a file called env_variables.sh and edit it with your favorite text editor.
First, we need to make sure that we have the appropriate certificates for our NKP Kommander dashboard FQDN that we're about to configure. Determine a DNS name for your NKP management cluster; I will choose nkp-lab.domain.local. Create a DNS entry in your local DNS infrastructure that points to the IP you set as the LB_IP_RANGE in the env_variables.sh file.
Perform the same steps as in part two of the series when you created the certificates for harbor, but now with the FQDN for your ingress in the req.conf file, to issue certificates from your CA or create self-signed certificates. In my case, it's as previously stated, nkp-lab.domain.local.
The content of the env_variables.sh should look like this, adjusting the different variables to match your environment.
export CLUSTER_NAME="joho-nkp-mgmt-cluster" # Name of the Kubernetes cluster
export NUTANIX_PC_FQDN_ENDPOINT_WITH_PORT="<IP TO PRISM CENTRAL>" # Nutanix Prism Central endpoint URL with port
export CONTROL_PLANE_IP="x.x.x.x" # IP address for the Kubernetes control plane
export IMAGE_NAME="nkp-rocky-9.4-release-1.29.9-20241008013213" # Name of the VM image to use for cluster nodes that we created in part one of this series
export PRISM_ELEMENT_CLUSTER_NAME="nxtest01" # Name of the Nutanix Prism Element cluster
export SUBNET_NAME="1700-GDM i Norr R&D" # Name of the subnet to use for cluster nodes
export PROJECT_NAME="10210-0000-GDM-Konsult-AB" # Name of the Nutanix project
export CONTROL_PLANE_REPLICAS="3" # Number of control plane replicas
export CONTROL_PLANE_VCPUS="4" # Number of vCPUs for control plane nodes
export CONTROL_PLANE_CORES_PER_VCPU="1" # Number of cores per vCPU for control plane nodes
export CONTROL_PLANE_MEMORY_GIB="16" # Memory in GiB for control plane nodes
export WORKER_REPLICAS="3" # Number of worker node replicas
export WORKER_VCPUS="1" # Number of vCPUs for worker nodes
export WORKER_CORES_PER_VCPU="8" # Number of cores per vCPU for worker nodes
export WORKER_MEMORY_GIB="32" # Memory in GiB for worker nodes
export NUTANIX_STORAGE_CONTAINER_NAME="nxtest-cnt01" # Name of the Nutanix storage container
export CSI_FILESYSTEM="ext4" # Filesystem type for CSI volumes
export CSI_HYPERVISOR_ATTACHED="true" # Whether to use hypervisor-attached volumes for CSI
export LB_IP_RANGE="x.x.x.x-x.x.x.x" # IP range for load balancer services from witch you will reach the kommander dashboard
export SSH_KEY_FILE="/home/administrator/.ssh/id_rsa.pub" # Path to the SSH public key file we created in part one of this series
export NUTANIX_USER="admin" # Nutanix PrismCentral username (left blank for security)
export NUTANIX_PASSWORD="<PASSWORD>" # Nutanix PrismCentral password (left blank for security)
export REGISTRY_URL="https://joho-registry.domain.local/library" # URL for the private container registry
export REGISTRY_USERNAME="admin" # Username for authenticating with the private registry (left blank for security)
export REGISTRY_PASSWORD="<PASSWORD>" # Password for authenticating with the private registry (left blank for security)
export REGISTRY_CA="/home/administrator/certs/ca-chain.cert" # Path to the CA certificate for the private registry we created in part two of this series
export INGRESS_CERT="/home/administrator/certs/nkp-lab.domain.local/nkp-lab-domain.local.cert" # Path to the cert of ingress
export INGRESS_KEY="/home/administrator/certs/nkp-lab.domain.local/nkp-lab-domain.local.key" # Path to the .key file of the ingress cert
export INGRESS_CA="/home/administrator/certs/ca-chain.cert" # Path to the ingress CA-chain file
export INGRESS_FQDN="nkp-lab.domain.local" #FQDN of the Ingress controller to be used for browsing NKP web GUI
export DOCKER_REGISTRY="https://joho-registry.domain.local/dockerhub" # URL To Pulltrough Cache for docker image pulltrough we created in part two of this series.
Now we need to load the variables into the system by running:
source env_variables.shNow we're ready to deploy the new cluster using the NKP command-line utility by firing off this one-liner:
nkp create cluster nutanix --cluster-name $CLUSTER_NAME \
    --cluster-hostname $INGRESS_FQDN \
    --ingress-ca $INGRESS_CA \
    --ingress-certificate $INGRESS_CERT \
    --ingress-private-key $INGRESS_KEY \
    --endpoint $NUTANIX_PC_FQDN_ENDPOINT_WITH_PORT \
    --control-plane-endpoint-ip $CONTROL_PLANE_IP \
    --control-plane-vm-image $IMAGE_NAME \
    --control-plane-prism-element-cluster $PRISM_ELEMENT_CLUSTER_NAME \
    --control-plane-subnets "$SUBNET_NAME" \
    --control-plane-pc-project $PROJECT_NAME \
    --control-plane-replicas $CONTROL_PLANE_REPLICAS \
    --control-plane-vcpus $CONTROL_PLANE_VCPUS \
    --control-plane-cores-per-vcpu $CONTROL_PLANE_CORES_PER_VCPU \
    --control-plane-memory $CONTROL_PLANE_MEMORY_GIB \
    --worker-vm-image $IMAGE_NAME \
    --worker-prism-element-cluster $PRISM_ELEMENT_CLUSTER_NAME \
    --worker-subnets "$SUBNET_NAME" \
    --worker-pc-project $PROJECT_NAME \
    --worker-replicas $WORKER_REPLICAS \
    --worker-vcpus $WORKER_VCPUS \
    --worker-cores-per-vcpu $WORKER_CORES_PER_VCPU \
    --worker-memory $WORKER_MEMORY_GIB \
    --ssh-public-key-file $SSH_KEY_FILE \
    --csi-storage-container $NUTANIX_STORAGE_CONTAINER_NAME \
    --csi-file-system $CSI_FILESYSTEM \
    --csi-hypervisor-attached-volumes=$CSI_HYPERVISOR_ATTACHED \
    --kubernetes-service-load-balancer-ip-range $LB_IP_RANGE \
    --insecure \
    --self-managed \
    --registry-mirror-url $REGISTRY_URL \
    --registry-mirror-cacert $REGISTRY_CA \
    --registry-mirror-username=$REGISTRY_USERNAME \
    --registry-mirror-password=$REGISTRY_PASSWORD \
    --registry-url $DOCKER_REGISTRY \
    --registry-cacert $REGISTRY_CA \
    --registry-username=$REGISTRY_USERNAME \
    --registry-password=$REGISTRY_PASSWORD
Now the cluster should start creating, and you can follow the creation process in the terminal.

If we head over to Prism Central to have a look, we can see that the installer has started deploying some new virtual machines.

Let's wait for the installer to proceed some more...
After a while, the installer will generate a kubeconfig file. Now we can connect to the cluster using that kubeconfig file to verify that everything is working as expected. Remember K9s that we installed in part one of the series?

Now we can use it to look under the hood at what's happening during the deployment by running the following command from a new SSH session (let the first session continue running to complete the process):
k9s --kubeconfig="/home/administrator/joho-nkp-mgmt.conf"Now we can browse through the different pods that are being created and look through some logs if we would like to. :)

If we now open up our Harbor repository that we called library and check the logs, we can see that the NKP installer is now pulling the images from the local repository instead of fetching them directly from Docker.

If we head back to the other SSH tab where the installer is still running, we can continue to follow the installation process.

Wait until all the different apps have been deployed. Once they are, you'll be presented with this screen:

Now you can run the NKP command to get your login credentials and URL to your dashboard:
nkp get dashboard --kubeconfig="/home/administrator/joho-nkp-mgmt.conf"It should provide the following output:
Username: gracious_grothendieck
Password: <Password>
URL: https://nkp-lab.domain.local/dkp/kommander/dashboard
Can't wait! Let's head into the dashboard:

You have now successfully deployed your NKP management cluster. Let's log in with the credentials from the command above.

The first thing we would like to do is apply an NKP Ultimate trial license. So head over to the menu and click "Licensing." Remove the existing license, and then click "+Activate License."

You can acquire a 30-day trial license from the Nutanix support portal by going to the hamburger menu and selecting "Licenses."
Once you're in the Licensing part of the support portal, click "Non-Production Licenses."

Once there, click "Request POC License" in the top left corner.

Browse your way down to NKP and click "Request POC License" for NKP Ultimate.

Follow the on-screen instructions, and once you have received your POC licenses, you should see it in the summary overview:

Now you can click "Manage Licenses" -> "Nutanix Kubernetes Platform." Add your cluster (use the exact same name as you chose in the CLUSTER_NAME in the env_variables.sh file). Claim your number of vCPU cores. Go through to the last page, and you'll get a License Key.
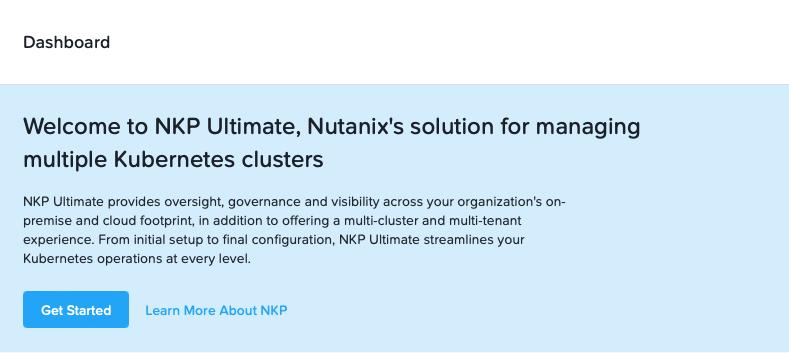
Then you can enter that license key into the dashboard:

Now the GUI should change, and you should see in your top right corner that you have licensed NKP Ultimate

If we take a look in the k9s shell, we can se that the process of deploying different addon applications has started, such as Grafana and Kubernetes Dashboard.

If you would like to explore some more configuration options while deploying the cluster you can get a complete set of flags by running the below command from your bastion host.
nkp create cluster nutanix --helpExtras:
If you would like to delete the cluster and redeploy for educational purposes or to try out different flags, you'll need to run this command from your bastion host:
nkp delete cluster --cluster-name <cluster-name> --self-managed --kubeconfig="<path to kube config>"The next part of the series is to provision some identity and infrastructure providers in NKP. Follow along in the next post:

Thanks for reading