Post 2: Deploying NAI


Now that we have our Rancher cluster and the required storage classes in place from the last post (which you can find below), let's get our hands dirty and deploy Nutanix Enterprise AI:
Aquire your pull-secrets
First things first. Nutanix Enterprise AI is stored on a private Docker repository, and you'll need a secret to download the images from Docker. To create your set of pull secrets, head to my.nutanix.com.
Then go to the Support & Insights portal -> Downloads -> Nutanix Enterprise AI. You'll be met by the text below:
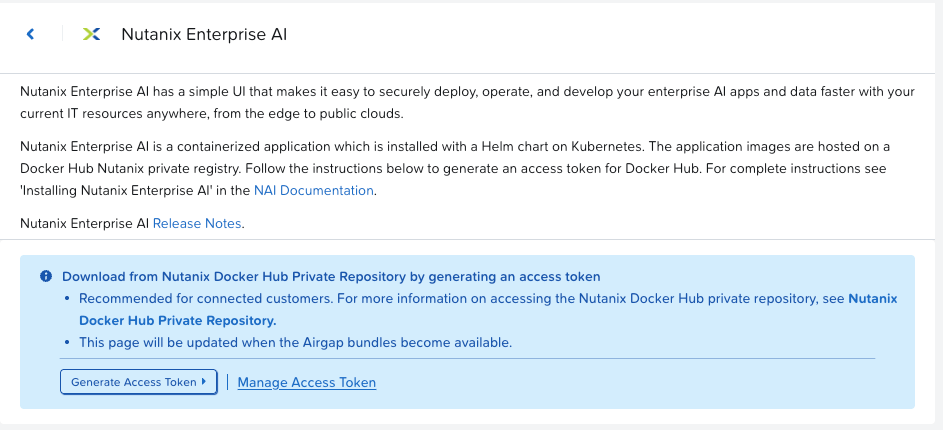
Click "Generate Access Token".
Save the tokens that get generated for later use.
Deployment of NAI
Let's start the deployment of NAI. To begin, we need some prerequisites. When deploying this on NKP (Nutanix Kubernetes Platform), the installation is said to be more straightforward. But since we're deploying this on a non-NKP environment, we need to install them manually.
The prerequisites are:
- knative
- istio
- cert-manager
- nvidia-gpu-operator
- kserve
- envoy-gateway
knative serving
To deploy knative serving, run the following commands:
kubectl apply -f https://github.com/knative/serving/releases/download/knative-v1.19.6/serving-crds.yaml

kubectl apply -f https://github.com/knative/serving/releases/download/knative-v1.19.6/serving-core.yaml
Then we need to tune knative:
# Node selectors
kubectl -n knative-serving patch configmap config-features \
  --patch '{"data":{"kubernetes.podspec-nodeselector":"enabled"}}'
# Disable scale‑to‑zero
kubectl -n knative-serving patch configmap config-autoscaler \
  --patch '{"data":{"enable-scale-to-zero":"false"}}'
# Tolerations
kubectl -n knative-serving patch configmap config-features \
  --patch '{"data":{"kubernetes.podspec-tolerations":"enabled"}}'
istio
To deploy istio, run the following commands:
kubectl apply -f https://github.com/knative/net-istio/releases/download/knative-v1.19.5/istio.yaml

kubectl apply -f https://github.com/knative/net-istio/releases/download/knative-v1.19.5/net-istio.yaml
cert-manager
To deploy cert-manager, run the following command:
kubectl apply -f https://github.com/cert-manager/cert-manager/releases/download/v1.18.2/cert-manager.yamlnvidia-gpu-operator
To deploy the nvidia-gpu-operator, create a file called nvidia-gpu-operator.yaml with the following content:
apiVersion: helm.cattle.io/v1
kind: HelmChart
metadata:
  name: gpu-operator
  namespace: kube-system
spec:
  repo: https://helm.ngc.nvidia.com/nvidia
  chart: gpu-operator
  targetNamespace: gpu-operator
  createNamespace: true
  valuesContent: |-
    toolkit:
      env:
      - name: CONTAINERD_SOCKET
        value: /run/k3s/containerd/containerd.sock
Run the command:
kubectl apply -f nvidia-gpu-operator.yamlkserve
To deploy kserve, run the following commands:
helm upgrade --install kserve-crd oci://ghcr.io/kserve/charts/kserve-crd \
  --version v0.15.2 --namespace kserve --create-namespace --wait
helm upgrade --install kserve oci://ghcr.io/kserve/charts/kserve \
  --version v0.15.2 --namespace kserve --create-namespace --wait \
  --set kserve.modelmesh.enabled=false
envoy-gateway & gateway API
To deploy the Envoy gateway and the gateway API, run the following commands:
kubectl kustomize "github.com/kubernetes-sigs/gateway-api/config/crd?ref=v1.3.0" >gwapi.yaml

kubectl apply -f gwapi.yaml

helm install eg oci://docker.io/envoyproxy/gateway-helm --version v1.5.1 -n envoy-gateway-system --create-namespace
Istio ingress and certs
First, we will create the cert for the kserve / istio ingress controller.
I just created a CSR using OpenSSL and uploaded it to our internal CA using this command:
#req.conf contents:
[ req ]
default_bits       = 2048
distinguished_name = req_distinguished_name
req_extensions     = req_ext
[ req_distinguished_name ]
countryName                 = Country Name (2 letter code)
stateOrProvinceName         = State or Province Name (full name)
localityName               = Locality Name (eg, city)
organizationName           = Organization Name (eg, company)
commonName                 = Common Name (e.g. server FQDN or YOUR name)
[ req_ext ]
subjectAltName = @alt_names
[alt_names]
DNS.1   = nai.testdomain.local
DNS.2   = nai
#openSSL command:
openssl req -new -out nai.testdomain.com.csr -newkey rsa:2048 -nodes -sha256 -keyout nai.testdomain.com.key -config req.confAfter you get your certificate and chain file back from your CA, save it to the same folder as the key and csr file, save it as nai.testdomain.com.cer and run the following command:
cat nai.testdomain.com.cer chain.cer > nai.testdomain.com-fullschain.cer
kubectl -n istio-system create secret tls nai-cert \
  --cert=nai.testdomain.com-fullschain.cer --key=nai.testdomain.com.key
Now you have created the ingress secret. Next, you need to patch the Istio ingress gateway:
kubectl patch gateway.networking.istio.io knative-ingress-gateway -n knative-serving --type='merge' --patch '{
"spec": {
  "selector": {
    "istio": "ingressgateway"
  },
  "servers": [
    {
      "hosts": ["*"],
      "port": {
        "name": "http",
        "number": 80,
        "protocol": "HTTP"
      },
      "tls": {
        "httpsRedirect": true
      }
    },
    {
      "hosts": ["*"],
      "port": {
        "name": "https",
        "number": 443,
        "protocol": "HTTPS"
      },
      "tls": {
        "credentialName": "nai-cert",
        "mode": "SIMPLE"
      }
    }
  ]
}
}'
Deploy NAI
Now that we have the Istio ingress and the other components ready, we can go ahead and deploy NAI itself!
Run the following command (change the values inside <> to the information you acquired in the first step from my.nutanix.com):
helm upgrade --install nai-core ntnx-charts/nai-core --version 2.4.0 \
  -n nai-system --create-namespace --wait \
  --set imagePullSecret.credentials.username=<USERNAME FROM PORTAL> \
  --set imagePullSecret.credentials.email=<YOUR EMAIL> \
  --set imagePullSecret.credentials.password=<THE SECRET FROM EARLIER> \
  --set naiApi.storageClassName=nai-nfs-storage \
--set defaultStorageClassName=default-nutanix-storageclassNow NAI is deployed. Once it's deployed, we need to apply our certificate to the Envoy ingress gateway as well:
rancher kubectl -n nai-system create secret tls ingress-certificate --cert=nai.testdomain.com-fullschain.cer --key=nai.testdomain.com.keyNow, we're using Antrea as our CNI in our Rancher deployments, and we use Antrea's External IP pool to assign external IPs to our services. So now we need to patch the Envoy Ingress that was created by the NAI deployment so we can access our newly deployed NAI installation.
First, run this command to get the name of the Envoy ingress gateway:
rancher kubectl -n envoy-gateway-system get serviceYou'll get an output like this:
NAME                                            TYPE           CLUSTER-IP     EXTERNAL-IP    PORT(S)                                            AGE
envoy-gateway                                   ClusterIP      100.64.2.48    <none>         18000/TCP,18001/TCP,18002/TCP,19001/TCP,9443/TCP   23h
envoy-nai-system-nai-ingress-gateway-ff52ba1f   LoadBalancer   100.64.1.165   <none>         80:30806/TCP,443:32212/TCP                         23h
Now annotate the service that has type LoadBalancer:
rancher kubectl -n envoy-gateway-system annotate service envoy-nai-system-nai-ingress-gateway-ff52ba1f service.antrea.io/external-ip-pool="antrea-ip-pool"Now the service should get a IP from our external IP-pool.
envoy-nai-system-nai-ingress-gateway-ff52ba1f LoadBalancer 100.64.1.165 192.168.0.222Now update your DNS and point nai.testdomain.com to 192.168.0.222.
Let's try it out:
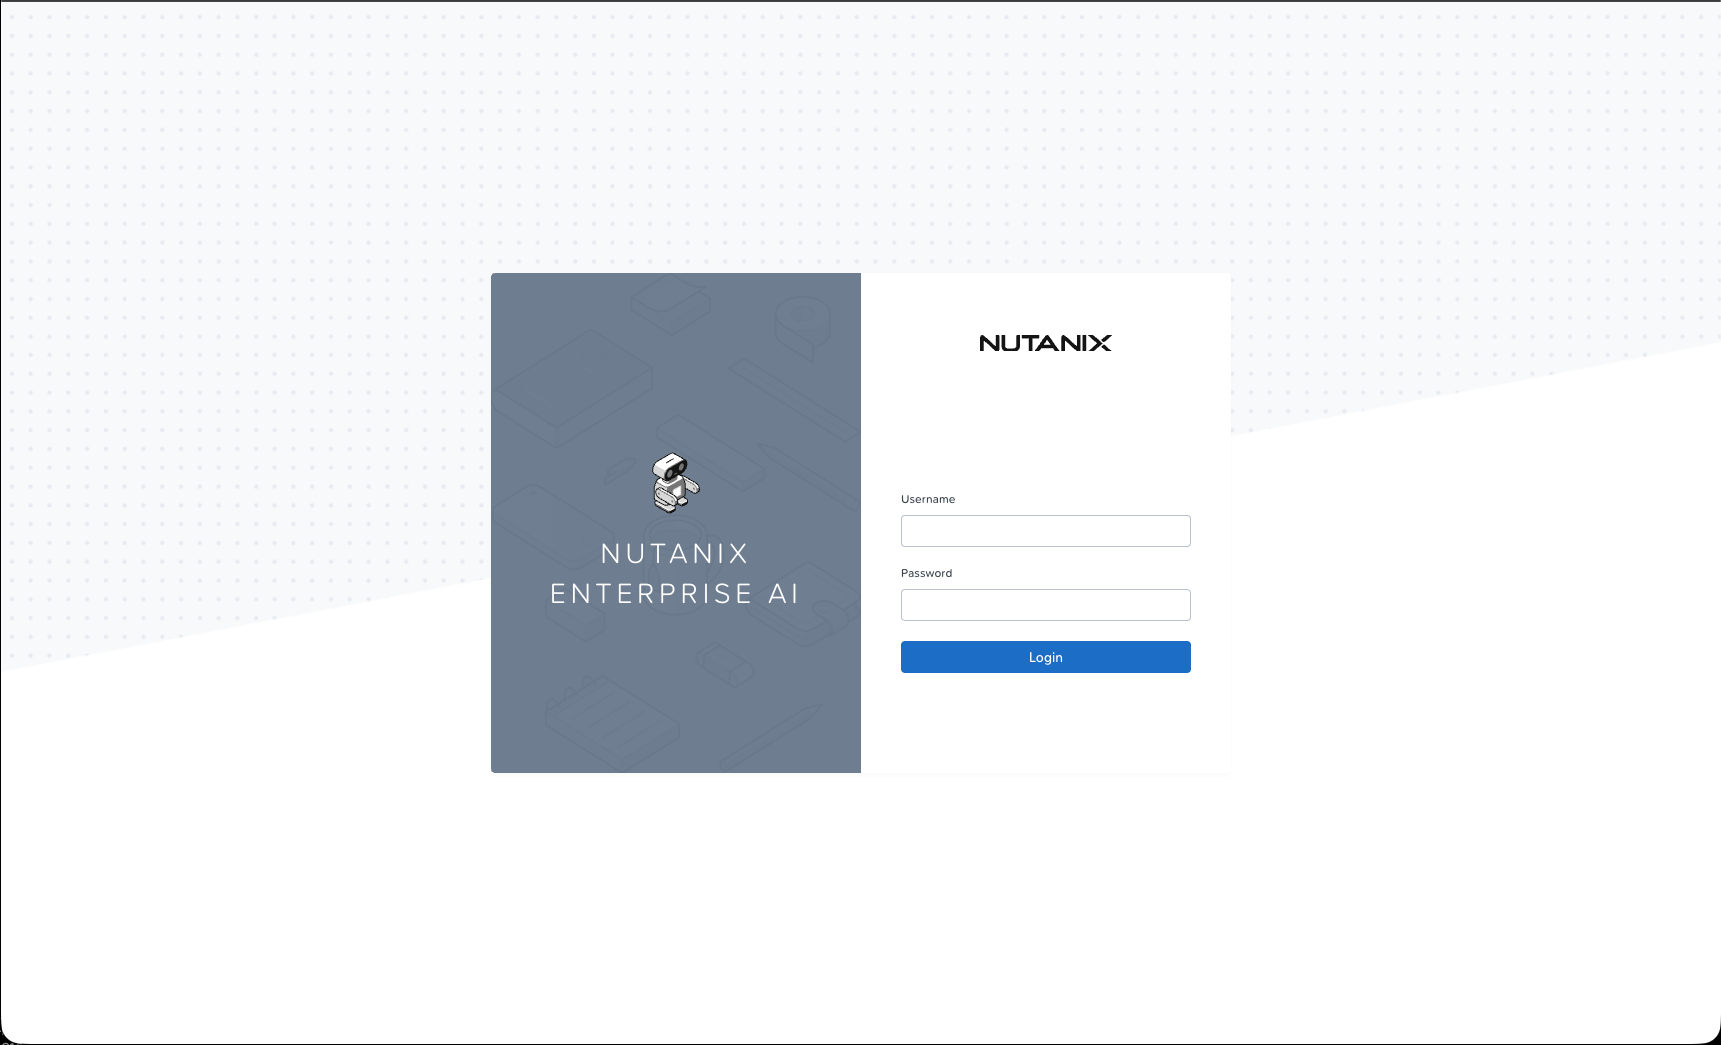
It works. Nice! To log in for the first time, use the username admin and the default password Nutanix.123. Change your password the first time you log in.

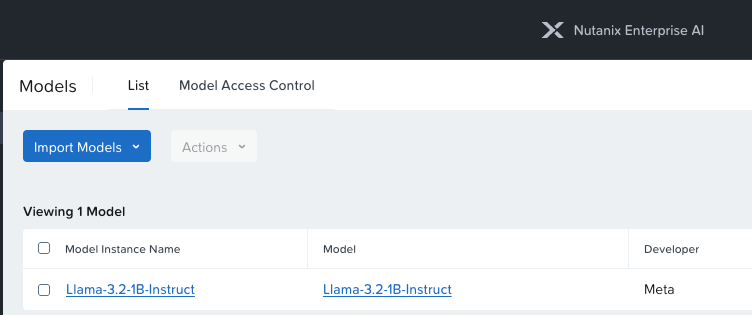
Now you're logged in to your Nutanix Enterprise AI instance. Nice WORK!
That's all for now. In the next post, we'll cover how you deploy your first LLM on the system. Read it by clicking the link below.